Finding yearbook collections
To get to the yearbooks on Ancestry:
Or,
- From any page on Ancestry, click the Search tab and choose Card Catalog.
- In the Title field in the top-left corner, enter “Yearbooks” and click Search.
- Select a yearbook collection in the search results.
Searching for people in yearbooks
- Go to a yearbook collection.
- Enter someone’s details in the search fields and click Search.
- Their school name can be entered in the Keyword field if it’s known.
- Leave any fields you don't know blank.
- Next to the yearbook you want to see, click View Record.
- On the record detail page, click the photo to enlarge it.
Navigating yearbook record images
To move the yearbook image, click and hold the left mouse button, then drag the mouse to reposition it. The image will move with your mouse.
On yearbook images, you can use these tools:
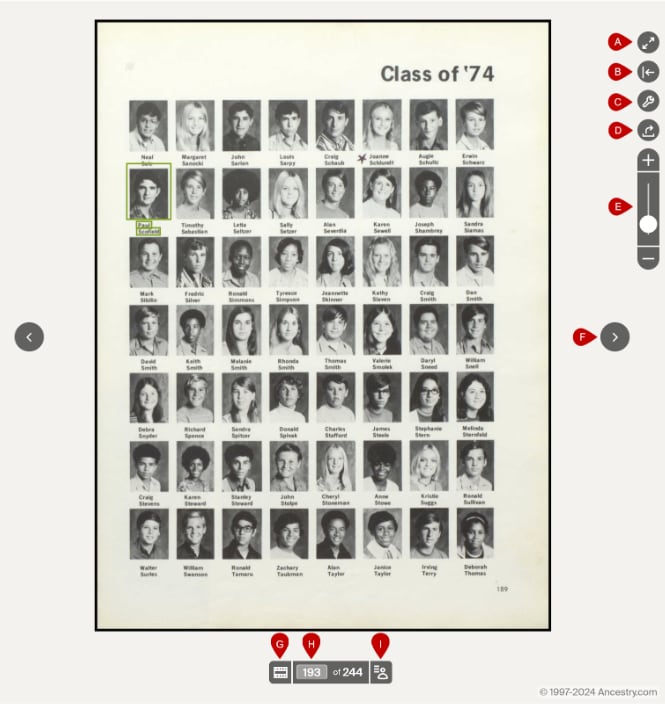
A. Full-screen: Click to enter full-screen mode; click again to exit.
B. Information panel: View details about the person or yearbook, related records, and source information.
C. Tools: Make a selection and follow any on-screen prompts as needed:
- Download
- Rotate left/right
- Flip horizontally/vertically
- Invert colors
- Settings
- Report problems
D. Share: choose a sharing method and follow any on-screen prompts as needed.
E. Zoom in or out: Make the image larger or smaller.
F. Page navigation: Use > for the next page and < for the previous page.
G. Filmstrip: Preview current and nearby pages.
H. Specific page: Enter a page number and click Go.
I. Index panel: View the index of others on this page.
Using the index panel
The index panel provides links to others on the same yearbook page. Click a name to highlight them on the page or make corrections to their transcriptions.
- Open the index panel by clicking the person icon in the toolbar below the yearbook image.
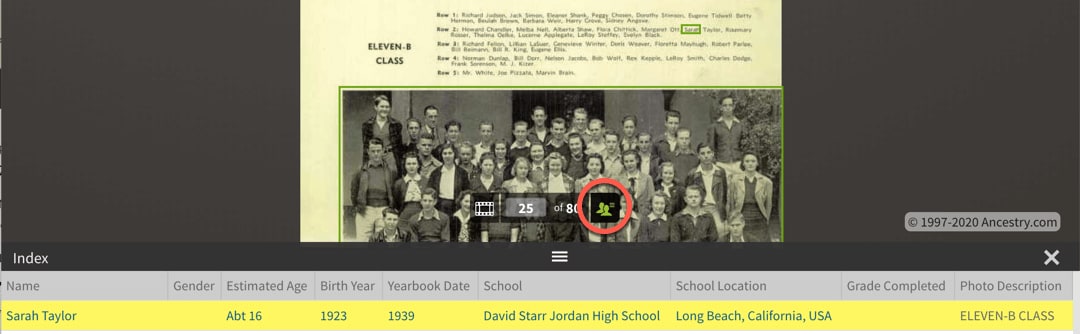
- Click a name to highlight them on the page, and sometimes, their photo on the image. No highlight?
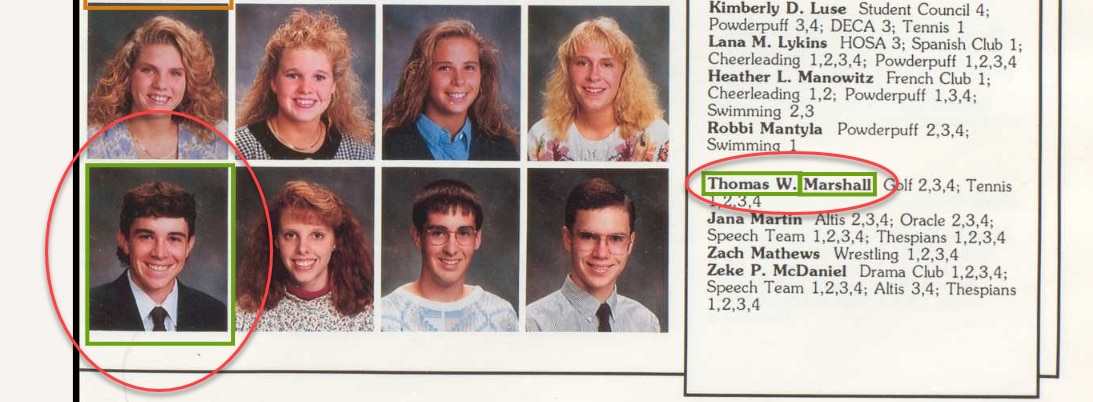
- Double-click a name or other details to add information (like alternate names) and make transcription corrections. This helps others find the record.
Saving yearbook records
From the record detail page:
- In the top-right corner, click Save.
- Choose how you want to save the image:
-
Save to someone in your tree > select a tree >
- If they’re already in your tree, type their name and select it when it appears > then click Attach.
- If they’re not in your tree, click Add this to a new person > enter their information > and click Save.
- Save to your shoebox > The record will be saved to your shoebox.
-
Save to someone in your tree > select a tree >
From the yearbook image:
- In the top-right corner, click Save.
- Choose how you want to save the image:
-
Save to person in your tree > select a tree >
-
If they’re already in your tree, type their name and select it when it appears > click Save > make your selections > and then click Save to tree.
Selection choices:- Profile photo: check the box to use the yearbook photo as their profile picture.
-
Facts and people: Compare the record to your tree and select boxes for any facts or people you want to add:
- NEW: facts are not yet in your tree.
- DIFFERENT: facts don’t match your tree.
- If they’re not in your tree, click add to a new person > enter their information, and click Save.
- Save to your computer: check the boxes next to the images you want to save, then click Save.
- Save to your shoebox: The record will be saved to your shoebox.
-
If they’re already in your tree, type their name and select it when it appears > click Save > make your selections > and then click Save to tree.
-
Save to person in your tree > select a tree >
Donating yearbooks
For information about donating yearbooks, review our Yearbook Submission Agreement. It outlines the yearbooks we accept, your responsibilities, and the address where you should mail your yearbooks.
To donate your yearbooks, print and complete our Yearbook Submission Agreement, include it in the package with your yearbooks, and ship it to the address listed within the agreement.
Frequently asked questions
Why isn’t their name or photo highlighted in a green box?
If their name or photo isn't highlighted, they might not be indexed, or the setting is off.
To turn on highlighting:
- In the toolbar to the right of the image, click the Wrench.
- In the Tools menu, click Settings.
- Next to Highlight Households, toggle the switch On.
What is the shoebox and where is it?
The Shoebox is a folder on the Ancestry homepage for storing records you’re not ready to attach to your tree. For more information, read The Ancestry Shoebox.